Creating a new Workflow
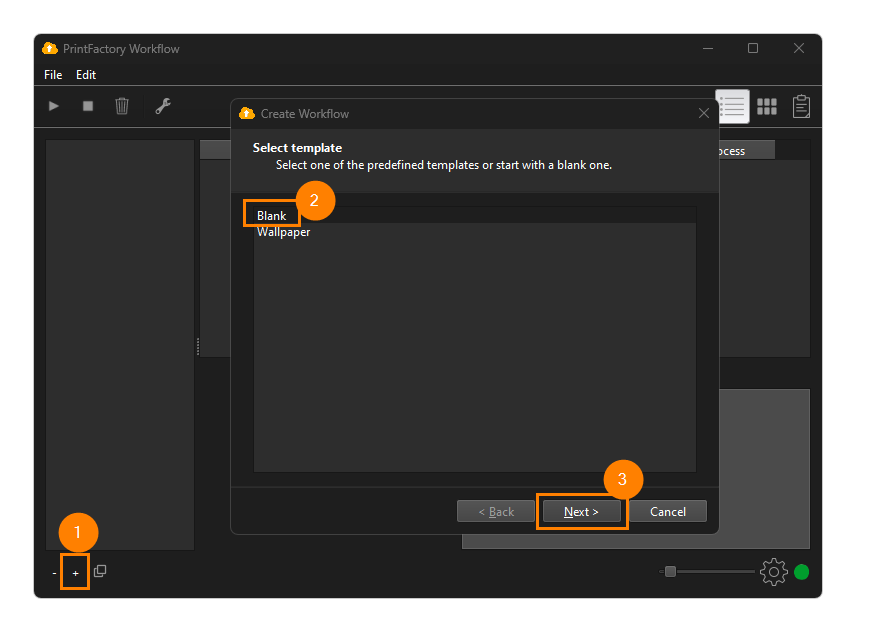
To create a new Workflow you first need to open the Workflow application. On a Windows PC, you will find it here: C:\Program Files\PrintFactory, and on macOS, here: HD/Applications/PrintFactory. After opening the application you need to click the plus (+) button to start a new Workflow, select a template or choose 'Blank' to start without a template, and then click 'Next'
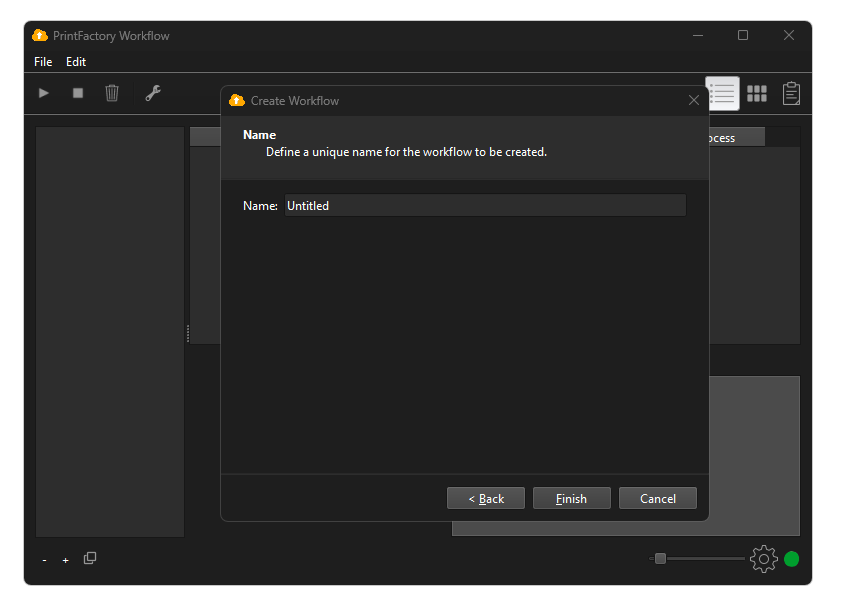
After clicking Next, give your Workflow a recognisable name:
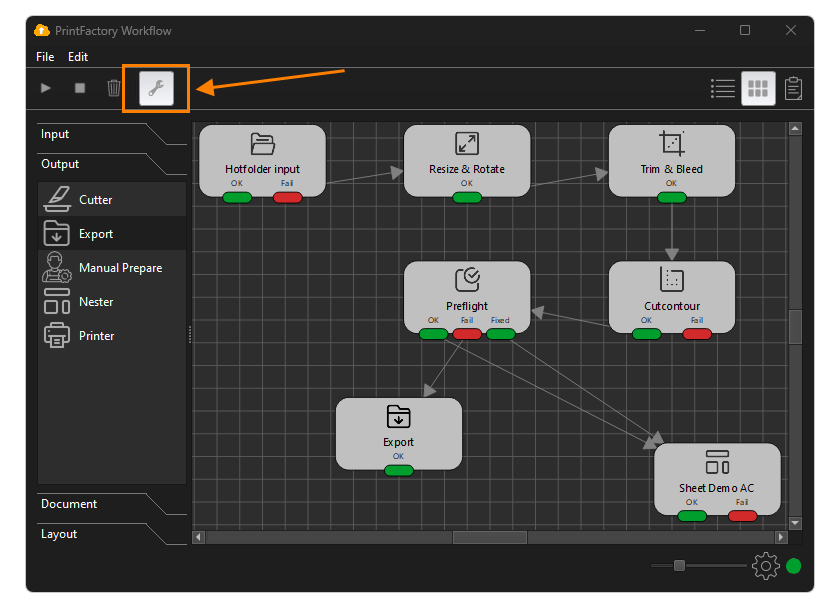
After clicking next, you will be presented with your blank Workflow in "Edit" mode (indicated by the grid on screen). You now need to drag and drop components from the left hand components palette onto your Workflow:
You should already have an idea of the type of Workflow you need to build. You need to choose an input method, that can be a simple Hotfolder (Similar to how RIP Queues currently work) or it can be a CSV file, XML/JDF Job Ticket or connection to an external Database. All input methods are valid, some more complex than others & the method you choose is dependant on the type of automated Workflow you are looking to create. After adding your Input component, the next step is to select your output component:
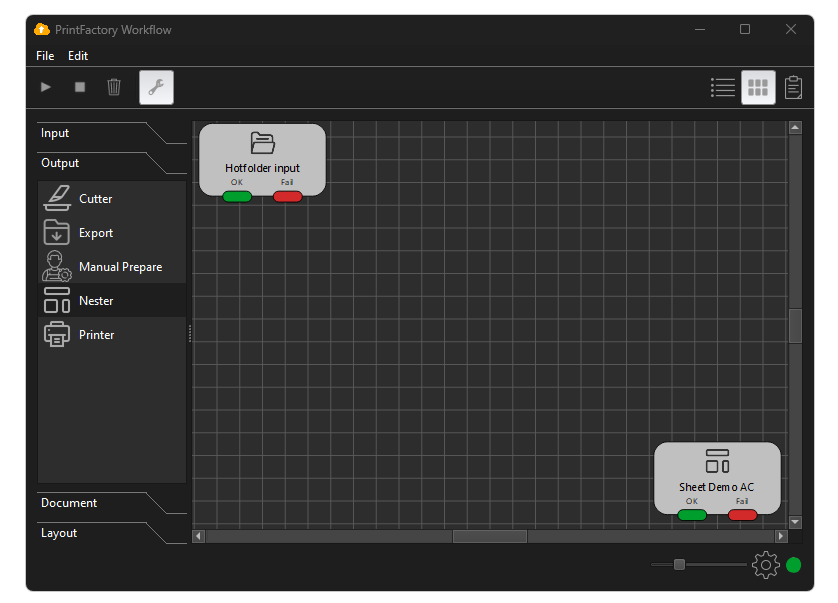
There are various output methods. Lets explain what they mean:
There are various output methods. Lets explain what they mean:
- Cutter = Direct to a cutter already installed on one of your RIPs.
- Printer = Direct to a printer already installed on one of your RIPs.
- Export = Exported to a folder.
- Manual Prepare = To the Layout manual prepare input folder, for manual nesting.
- Nester = To the Cloud based automated nester.
In the above example, I have selected the Nester. Now that the input & output are determined, you need to add the pre-press components required in your Workflow:
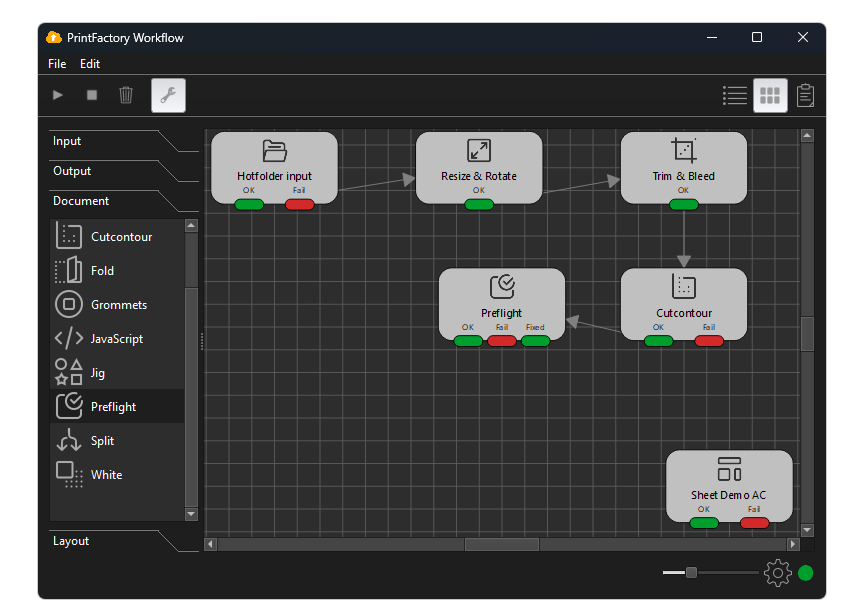
The above example now contains an input, an output, and, various pre-press steps. Each time you add a new step, you need to draw an arrow by dragging the cursor from the green "OK" button and dropping it onto the next component in your Workflow. These arrows will determine the order each component is initiated in your Workflow. Some components also have a red "Fail" button, and some have additional buttons, such as the preflight "Fixed" button. You also should determine what happens in these scenarios:
In the above example you can now see that if a pre-flight fix has been applied, or if the file does not require a fix, then it continues onto the Nester. If the pre-flight fails, it will be exported. We have now created a basic static Workflow. When the Workflow is complete, click the Edit icon to exit the edit mode:
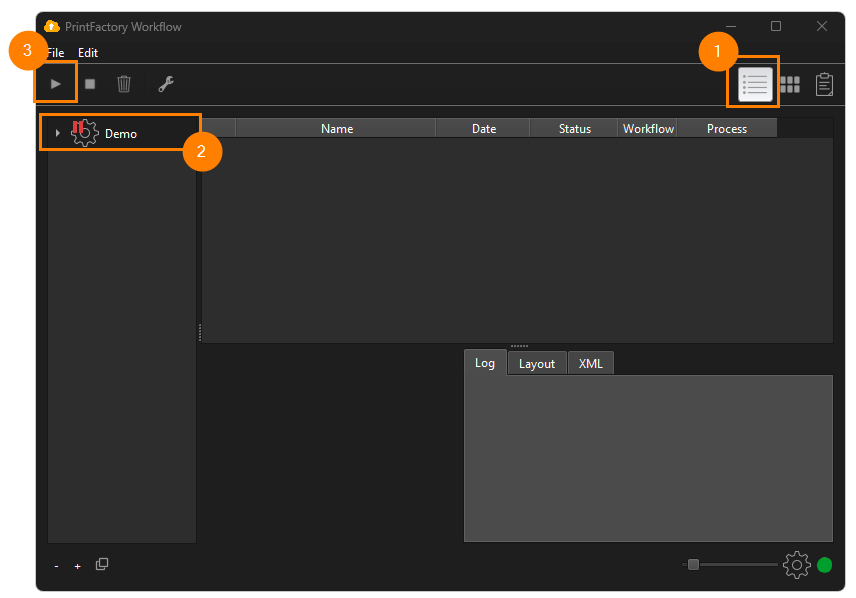
You can now click the "Job List" (1) button, select the Workflow (2) and click the Play (3) button to start the Workflow. As soon as you click the start button the Workflow will be active and it will start monitoring the Hotfolder, or database, for input files.
Related Articles
How to add new media sizes to the Cloud nest Queue bucket
When creating a Cloud Nest Queue bucket, you will see a drop down list of default media sizes. As you are not directly connected to the RIP from here, this list does not represent media sizes available for your printer, this list is the same for all ...Creating a direct-to-garment (DTG) pmm
In this step-by-step guide, we'll walk through the process of creating media profiles(*PMMs) tailored for DTG printing. Whether you're a seasoned printer or a newcomer, understanding how to optimize media profiles is crucial for achieving vibrant and ...How to Setup Cloud Nesting from Start to Finish
How to Set Up a Cloud Nest Queue in PrintFactory This guide walks you through the full setup of a Cloud Nest Queue in PrintFactory, including preparing the RIP , creating nesting presets, and the nest queue, and then connecting everything through the ...Workflow Menu
Windows You can find the menu here. Mac You can find the menu here. Preferences Connection Concurrent jobs Number of Jobs Workflow may process simultaneously. Each CPU (core) on your Computer can do 1 Job at a time, so maximum to be set to the amount ...Workflow Debug mode
Debug mode can be enabled in your Workflow to enable you to check the Job XML & file at each step in the Workflow. To enable debug mode, right click the Workflow name and click "Enable Debugging" When the debugging is enabled, you will see the little ...