Direct to Garment profiling and the DTG Separation tool
In this step-by-step guide, we'll walk through the process of creating media profiles(*PMMs) tailored for DTG printing. Whether you're a seasoned printer or a newcomer, understanding how to optimize media profiles is crucial for achieving vibrant and accurate prints all whilst minimizing the amount of ink used. This approach to DTG is consistent with our promise to users to maximize profits without compromising on quality. Additionally, we'll delve into the Editor DTG separation tool, exploring its features and demonstrating how it integrates with your previously created media profiles.
Creating a DTG PMM
Creating a PMM tailored to a DTG workflow is very similar to creating a regular PMM as explained in our Creating a PMM how-to video with a few important differences. In this example we're using a Kornit Atlas Max with CMYKRG inkset, although the steps seen in this article are the same for other DTG devices and inksets. It is advised to watch the Creating a PMM video first so that you understand the basic concept of the PMM wizard and where to find it. So let's get started..
Important Notes:
- It is best practice to build a separate profile for each different coloured garment.
- The linearization of the White and subsequent brightness adjustments will be very different depending on the lightness of the garment.
- The two linearization charts (white and color) should be measured in for DTG systems using the “Average 3x” setting. Otherwise, there could be significant bumps in the resulting curves and high DeltaE reported after measuring the Full Gamut.
Start a new PMM on your DTG printer, configure the print mode settings & proceed to give it a name:
After clicking next you will find yourself on the White linearization page, you will need to print the linearization chart to make the first visual assessment. At the bottom of the linearization chart you will see this interesting yet important feature:
This feature added to the White linearization chart is designed to assist in determining the maximum allowable amount of White ink for printing on a garment without encountering negative overinking effects. The top bar of the chart illustrates 100% White ink coverage across the entire width. The bar beneath it starts at a 5% White block on the left and progressively increases in 5% increments until reaching 100% White. The bottom bar features White 'teeth' that mirror the ink percentage of the block above. Overinking effects, such as cracking in solid ink blocks and spidering in the teeth, should be monitored. The following example showcases White spidering in the teeth, with an arrow indicating the point to clip the White ink. In this specific case, the White ink was clipped at 75%, as exceeding this threshold resulted in overinking defects in the teeth as seen in the close up photo on the right:
After you have made a visual assessment of the maximum White ink limit (some printers are perfectly capable of being left on 100%) then you need to return to the White linearization page and set your chosen maximum ink limit & print the chart again:
After measuring the chart, click the Next button to proceed to the next step:
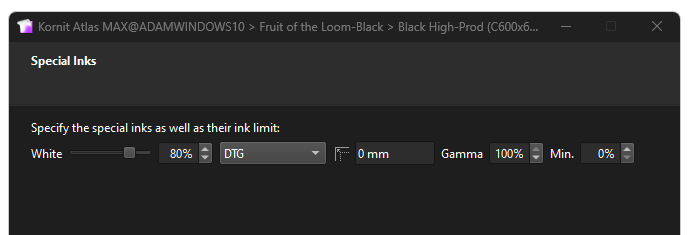
DTG is already selected in the drop down menu, therefore you can click Next again without making any changes and proceed to the next step.
DTG is already selected in the drop down menu, therefore you can click Next again without making any changes and proceed to the next step.
Now, we get to the DTG Brightness and Ink limit chart, a crucial step in determining the White ink underbase percentage applicable to colored components within your DTG image. This chart shows a combination of different inks, the more colours in the inkset the higher the number of combinations required to measure. The printing and measuring of this chart constitutes 90% of the process, providing foundational data. The remaining 10% involves a visual assessment, serving to confirm or fine-tune the constraints established by the measurements:
In the above screenshot, the DTG Brightness chart is showcased on a black t-shirt, revealing the wizard's automatic removal of the White underbase in areas where there is 100% Black. This elimination is a result of utilizing the black of the t-shirt, eliminating the need for a White underbase. Additionally, the wizard has made adjustments to the White percentages in other color combinations, according to the measurements. It is essential to visually inspect the chart and customize the percentages if required, especially in response to undesirable overinking effects, paying close attention to the darker colors.
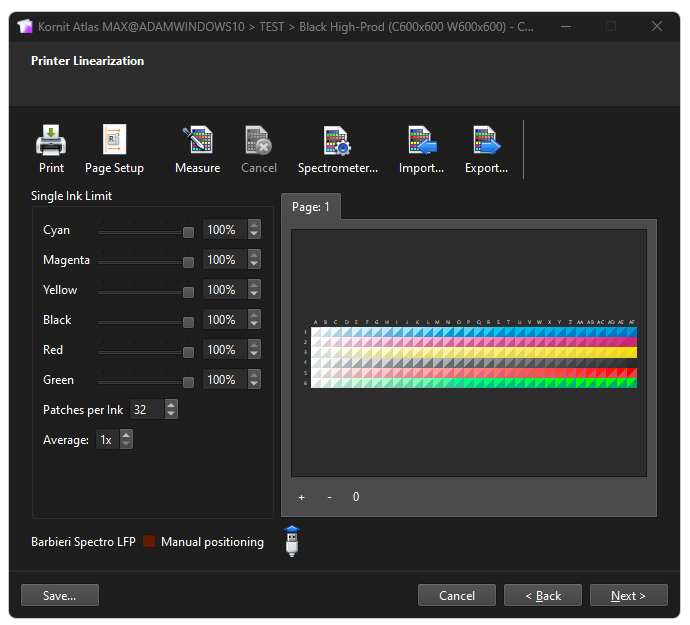
The next step is the color linearization which will have the White underbase applied underneath. You simply need to print & measure this chart & go to the next step showing you the spider chart:
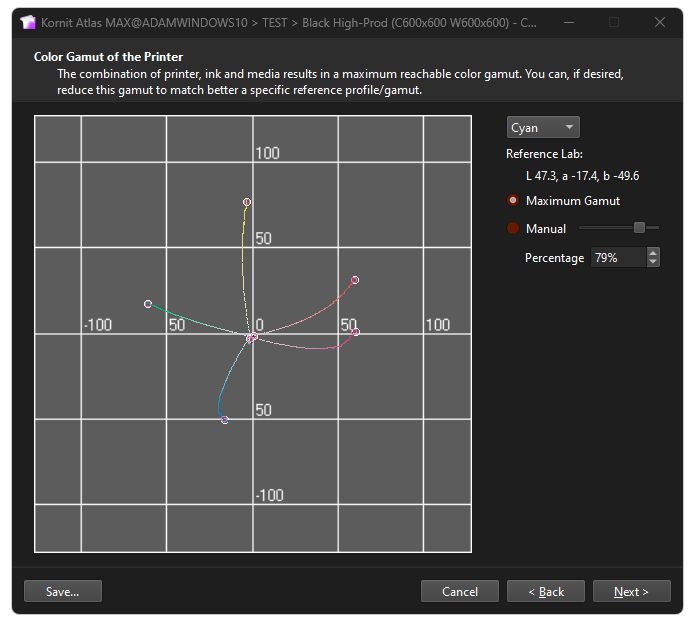
In the spider chart above, if the ink percentages are very close to 100% you can manually drag the slider to 100%, if not you can leave it at the predetermined amount based on the previous measurements. Proceed to the Total Ink limit chart:
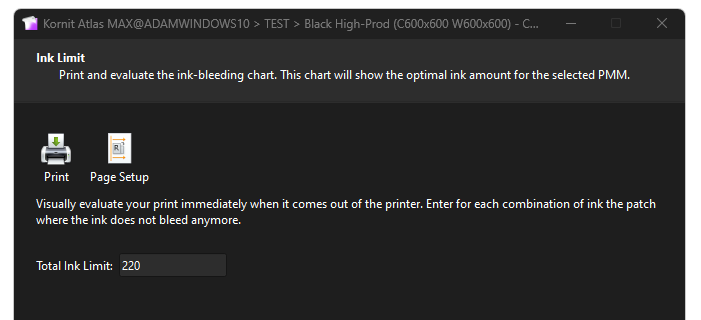
The Total ink limit will be automatically decided based on the previous measurements. In DTG it is less important to print this chart, in most cases you can trust the automatic ink limit and proceed to the next step. Having said that there is also no harm in printing the TAC chart if you would like to confirm the automatic TAC choice.
The Total ink limit will be automatically decided based on the previous measurements. In DTG it is less important to print this chart, in most cases you can trust the automatic ink limit and proceed to the next step. Having said that there is also no harm in printing the TAC chart if you would like to confirm the automatic TAC choice.
Next is the colour gamut chart, it simply needs to be printed & measured serving as the final stage in completing the profile:
Important Notes:
- It is best practice to build a separate profile for each different coloured garment.
- The linearization of the White and subsequent brightness adjustments will be very different depending on the lightness of the garment.
- The two linearization charts (white and color) should be measured in for DTG systems using the “Average 3x” setting. Otherwise, there could be significant bumps in the resulting curves and high DeltaE reported after measuring the Full Gamut.
Using the DTG Separation tool in Editor
The DTG Separation tool, accessible in PrintFactory Editor, is crafted to eliminate unnecessary colors from the image. Its purpose is to enable effective printing on colored garments, preventing overinking or the use of ink that isn't required, based on the garment color. Additionally, the tool offers features such as applying White choke and highlighting specific channels for special effects. After creating a DTG Separation preset it can be linked to the PMM you created earlier. So let's look at the features...
First you need to open Editor, open your artwork and head to the Extra menu, here you will find the DTG Separation option:
First you need to open Editor, open your artwork and head to the Extra menu, here you will find the DTG Separation option:
A pop up window will appear showing you your Cloud-shared list of DTG Separation presets. You can edit an existing preset here, delete an existing preset, or create a new one:
Clicking the plus button will open the DTG Separation tool on screen:
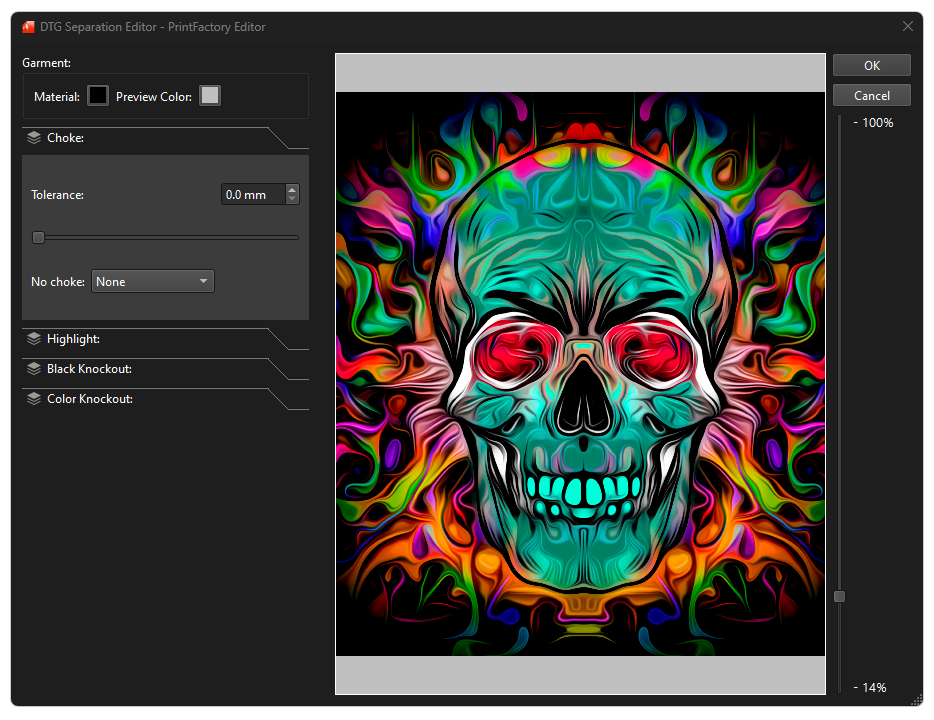
Garment: Material and preview color
Material: This is showing the color of the material, by default it is set to Black. You can click the colour selector and change the material colour from Black to Colour. You can enter the material color in CIELab, AdobeRGB, or sRGB color space. It is recommended to measure the garment color with a spectrophotometer to get an accurate LAB value.
Preview Colour: This is the on-screen background preview color which can act as a visual aid whilst determining the configuration of your DTG preset.
Choke: Applying choke to the PMM White underbase
Tolerance: Set in millimeters the amount of choke to be applied to the White underbase. A typical amount of White choke is around 0.1-0.2mm for most modern printers.
No choke: This functionality enables content-aware choke. When you activate 'White only ink,' choke is eliminated in areas where only white ink is present. The idea behind this is straightforward—if there's no color overlaying the white ink, there's no need to choke the white. This becomes particularly important for preserving the clarity of thin white-only text or lines, preventing them from disappearing or showing defects. Alternatively, you can opt for "Under spot colors," which removes choke under spot colors for the same reason as under white. Choosing "none" applies choke universally across the design.
Highlight: Printing an extra highlight layer
Range: The higher the range percentage, the more highlight ink will be printed. It is directly correlated with the luminance of the component parts of the image.
Amount: The percentage of ink that will be printed. The actual ink that is used is determined in the channel selector.
Channel: Selecting the channel from the inkset that the highlight parameters will apply to.
Note: The highlight channel is a lesser used part of the DTG separation tool as it will increase the ink usage and slow the production speed due to the extra layer printing. In most cases it is not required except for when special effects are required.
Black Knockout: Removing black from the image for printing on black garments
Tolerance: This slider is deciding the level of black knockout. The higher the percentage the more black is removed from the image. This tool negates the requirement for third party applications such as Adobe Photoshop, to remove the black:
Chroma: This slider will decide the amount of dark ink that is also removed around the edges of black and shadow areas to better utilise the black garment color and create a feathering effect, this will help to avoid a hard edge where ink is used instead of the garment color. It will create a more visually pleasing end result when printing on black/dark garments:
Colour Knockout: Removing color from the image for printing on colored garments.
To enable the color knockout tool you must input a material color in the Garment option:
Tolerance: This slider is deciding the level of color knockout. The higher the percentage the more color is removed from the image. This tool again negates the requirement for third party applications such as Adobe Photoshop, to remove the color. In this example I have set a red material color, therefore red knockout will be applied to the image & the material color will be used to create the red instead of unnecessary ink usage:
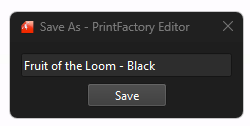
When you have completed the DTG Separation preset, click OK and give the preset a relevant name:
Linking the DTG Separation preset to a PMM
After creating the DTG Separation preset, it is stored both locally on your computer and uploaded to your Cloud resources. Subsequently, it becomes accessible across all installations of PrintFactory within your organization. To streamline the workflow, you have the option to link your DTG Separation preset to a DTG PMM. This linkage ensures that the separation settings are automatically applied to all jobs processed by the connected PMM:
1. Open Calibrator and select your DTG Printer
2. Select the media
3. Right click on the mode and select 'Link DTG Preset'
After selecting the required DTG preset & clicking OK, it will be linked. This association ensures that the chosen DTG Separation preset is consistently applied to all jobs processed by this specific PMM. This integration facilitates workflow automation through features like RIP Queues, PrintFactory Workflow, and other automation tools. The key benefit is the elimination of the need for manual application of the DTG Separation in PrintFactory Editor. Now, let's take a closer look at a processed end-result:
In this preview, we observe a processed job intended for printing on a black t-shirt. Thanks to the DTG Separation preset linked to the PMM, the black color from the original image has been eliminated, allowing the black of the t-shirt to serve as the backdrop. The White underbase will be printed beneath the remaining colored elements of the image. This strategy minimizes ink usage where unnecessary, ensuring a high-quality printed result while optimizing efficiency.
Related Articles
Kornit DTG set-up
Kornit DTG printers uses a dynamic configuration system based on KST files. Those files define the resolutions, media properties and all handling settings that are available in the DFE of the printer. At the printer a the PrintAgent needs to be ...Variable Data Printing (VDP)
The variable data process involves a template file, in which PlaceHolders and special keywords are defined. When Variable Data is used, these PlaceHolders and keywords will be replaced. In the Editor, Variable data can be done by importing files in a ...swissQprint Relief & Textured Printing
swissQprint UV inkjet printers are capable of impressive relief and textured printing, offering a range of capabilities that cater to the demands of various industries. These printers are recognized for their proficiency in creating layered relief ...Standardized LFP Printing
Introduction This document aims to clarify the difference between “Regular” printing in the LFP world with the newer concept of “Standardized” printing. Both concepts will be explained, as concept, but also how to actually do it in PrintFactory. ...Standardized LFP Printing
Introduction This document aims to clarify the difference between “Regular” printing in the LFP world with the newer concept of “Standardized” printing. Both concepts will be explained, as concept, but also how to actually do it in PrintFactory. ...