Submit DTG Job via Cloud API
How to submit a Job via Cloud API to DTG printer
General Postman documentation can be found here.

This example is specifically for Cloud API
Specifications of example Job
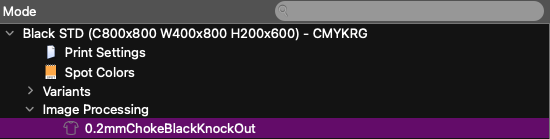
 In this example we use a PMM which has your required "Image Processing" steps and White generation stored in the PMM which is used for the Job.
In this example we use a PMM which has your required "Image Processing" steps and White generation stored in the PMM which is used for the Job.
"Image Processing" step screenshot below of Mode in Calibrator.
Job.xml specification
Below the Job.xml which has to be posted to Cloud API. Documentation of the Job.xml can be found here, all dimensions are in 1/18". Elements and attributes written in Purple need to be fetched by API's to be able to inject them in the Job.xml. Calls are listed in order at end of document with explanation and links.

<Job Version="2">
<JobGUID>02903cab-efea-4a71-b050-4e222d991cdf</JobGUID>
<!-- JobGUID : Unique ID generated by yourself and used to track the job. Must be unique for each Job submitted -->
<!-- JobGUID : Unique ID generated by yourself and used to track the job. Must be unique for each Job submitted -->
<DeviceGUID>5e8fe5f5-49be-47e0-b951-26d1679ca5cf</DeviceGUID>
<!-- DeviceGUID : ID of the device used for the job -->
<!-- DeviceGUID : ID of the device used for the job -->
<PrinterProfile GUID="09d88172-5b91-4b96-98c8-5b34d099be40" />
<!-- Printer profile by GUID: GUID of the PMM (Printer-Media-Mode profile) -->
<!-- Printer profile by GUID: GUID of the PMM (Printer-Media-Mode profile) -->
<ModeVariant>Visual Match</ModeVariant>
<!-- Variant selector : Variant of the PMM to be used. The name must exist in the PMM -->
<ReferenceProfile GUID="c4dca0122-118d-45f2-8c5e-3e70cbdc2df9" />
<!-- Reference profile by GUID: GUID of the reference profile -->
<!-- Variant selector : Variant of the PMM to be used. The name must exist in the PMM -->
<ReferenceProfile GUID="c4dca0122-118d-45f2-8c5e-3e70cbdc2df9" />
<!-- Reference profile by GUID: GUID of the reference profile -->
<Name>APITestJobKornit</Name>
<!-- Name of the job as shown in the UI -->
<!-- Name of the job as shown in the UI -->
<User>Postman</User>
<!-- User that created the job -->
<!-- User that created the job -->
<Producer>API</Producer>
!-- Application that created the job, adviced in this workflow to mimic the Layout application -->
!-- Application that created the job, adviced in this workflow to mimic the Layout application -->
<FromEditor>true</FromEditor>
<!-- To avoid further local workflow to be applied set <FromEditor> to true -->
<!-- To avoid further local workflow to be applied set <FromEditor> to true -->
<Print>true</Print>
<!-- Print set to true to indicate this job is for the printing process -->
<!-- Print set to true to indicate this job is for the printing process -->
<MediaSize Name="Standard pallet" Width="280.913391" Length="352.913391" Roll="false">
<Margins>0.354,0.354,0.000,0.354</Margins>
</MediaSize>
<!-- MediaSize : Definition of the substrate physical dimensions. Margins define where the printable/addressable area start -->
<TrayName>Pallet</TrayName>
<!-- TrayName : MediaSources.Name of the API call result -->
<!-- MediaSize : Definition of the substrate physical dimensions. Margins define where the printable/addressable area start -->
<TrayName>Pallet</TrayName>
<!-- TrayName : MediaSources.Name of the API call result -->
<JobType>Proof</JobType>
<!-- Type of Color management strategy. To invoke normalized color processing use the type Proof (recommended) -->
<!-- Type of Color management strategy. To invoke normalized color processing use the type Proof (recommended) -->
<Copies>3</Copies>
<!-- Amount of Copies to be printed of the Job -->
<!-- Amount of Copies to be printed of the Job -->
<Documents>
<Document GUID="f8926abd-62ce-4784-abdb-59c47234e0ce" Name="T-Shirt Design 1" Type="jpg">
<Location>/Users/mirkovrielink/Documents/Testfiles/T-Shirt Design 1.jpg</Location>
<Pages>
<Page Number="0" Width="270.000002" Height="270.000002" />
</Pages>
<!-- Definition of all used pages of the document, defining its page index (0-based) and dimensions -->
<!-- Definition of all used pages of the document, defining its page index (0-based) and dimensions -->
</Document>
<!-- Document: Each document is identified with an unique number. The number must be unique globally, the scope is beyond this job -->
</Documents>
<!-- Documents: List of the document referred to by the Imposition-parts. The location can be a file path or a http(s) location. FileSize and Page dimensions are not required but strongly recommended -->
<!-- Documents: List of the document referred to by the Imposition-parts. The location can be a file path or a http(s) location. FileSize and Page dimensions are not required but strongly recommended -->
<Imposition>
<Parts>
<Part>
<Document GUID="f8926abd-62ce-4784-abdb-59c47234e0ce" Page="0" />
<!-- Reference to the previously defined document on GUID and the page (0-based) within that document -->
<!-- Reference to the previously defined document on GUID and the page (0-based) within that document -->
<SourceArea Left="0" Top="0" Right="270.000002" Bottom="270.000002" />
<!-- Crop rectangle of the page selected by the above tag -->
<!-- Crop rectangle of the page selected by the above tag -->
<DestinationPage>1</DestinationPage>
<!-- Output page (1 based) on which this part is printed -->
<!-- Output page (1 based) on which this part is printed -->
<Position X="3.5" Y="3.5" />
<!-- Position on the output page where the top-left point of the part its bounding box (defined by SourceArea) is placed -->
<Scale X="0.456608" Y="0.456608"/>
<!-- Scale of the document, applied before placing, so before rotation -->
<Angle>0</Angle>
<!-- Angle on which the part of rotated, rotates counter clockwise-->
</Part>
<!-- For each item on the output page create a part. The parts are rendered in the sequence as present in the job xml -->
<!-- For each item on the output page create a part. The parts are rendered in the sequence as present in the job xml -->
</Parts>
</Imposition>
<!-- Imposition: Layout of the document and parts on the output page. This sample is straight position, scale and rotate. Advanced options are available here -->
<!-- Imposition: Layout of the document and parts on the output page. This sample is straight position, scale and rotate. Advanced options are available here -->
</Job>
API calls to be done
Calls 1 to 5 should be stored on you end and only be re-called when new Resources and/or Devices are added. GUID's won't changes in our Database.
1. DeviceGUID
Use DeviceGUID from response
2. PrinterProfile
Use "NormalProfile" in body
Use GUID from response
Use GUID from response
3 ModeVariant
Use "PrinterProfile GUID" in header
Use /Variants/Name from response
Use /Variants/Name from response
4 ReferenceProfile
Use ResourceType IccProfile in body
Use GUID from response
Use GUID from response
5 MediaSize / TrayName
Use DeviceGUID in header
Use response data of preferred media Name from MediaSizes
Use Name from MediaSources form preferred TrayName
Use Name from MediaSources form preferred TrayName
6 Add Job
Related Articles
Pull DTG job using barcode/QR-code scanner
The common workflow for a DTG job consist of the following steps: Upload the job using /api/v2/job without specifying the DeviceGUID. This puts the job in a generic holding queue. Pull the job its preview on the display at the moment the job its ...Job XML Generator for API
Use this page to build a valid Job.xml for PrintFactory’s Cloud API, without manual math. The tool lets you enter job metadata, define documents, and place imposition parts while a live preview shows how everything fits on the media (with margins). ...DTG Separation Tool
Using the DTG Separation tool in Editor The DTG Separation tool, accessible in PrintFactory Editor, is crafted to eliminate unnecessary colors from the image. Its purpose is to enable effective printing on colored garments, preventing overinking or ...Job Tracking
It is possible to track your jobs and the individual images in a nest by accessing the Tracking tab in the Cloud. From here you can preview the nested job & print part labels that can be kept with the job as it travels around your workplace. Lets ...Cloud Certification
By default a QR code is printed next to the Certification strips. This feature allows you to : certify jobs remotely share the certification results online pull the certification results via a mobile scannable QR code still certify jobs that are no ...